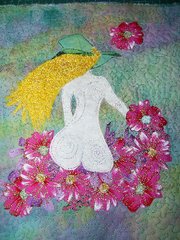
I am so happy with how this padfolio all went together. We are doing a "padfolio" swap on Fiber Art Friends group, and our lovely SueB provided the pattern for it (thanks Sue)! I thought I'd have a practice at making one using the fabric I had altered from a previous post - and now look at it! It has been transformed into a wonderful padfolio........
Wednesday, January 31, 2007
Thankyou Anna!!
Today I received a wonderful surprise from a generous and talented textile artist. I had commented on Anna's blog about her terrific teabag postcards, and guess what I received in the mail - a sample piece of fabric made out of teabags - it looks GREAT close up. Oh, I am so lucky, plus a couple of teabags that Anna uses, and that's not all - a wonderful ATC, which has some beautiful texture on it. Thankyou Anna!!
Saturday, January 27, 2007
Play Day Today
I had a great day today! I played with melting felt first. I layered the felt with lots of bits and pieces, covered it with netting, did some FME, then zapped it with the heat gun. It came up quite nice, with lots of crunchy bits and lots of raised areas with some good colours popping out. I then rubbed some green and purple Treasure Gold on the raised areas. This was the challenge for the Textile Challenges Group.
Then I grabbed some fabric that has been sitting in my cupboard for a VERY long time!! I cut it into squares and sewed them together. The first photo is how it started out, the second photo is how it has finished up. It took forever!!!! But I'm really happy with the end results. (Looks better than it does in the photos).
Wednesday, January 24, 2007
Detached Chain Stitch - ATC
2 posts today!! Boy, I'm on a roll.... Detached chain stitch was the TAST challenge for last week. I had a background already cut out from a piece I had made on the embellisher, so thought I would make an ATC out of all detached chain stitches. I used mainly DMC threads of different thicknesses, and added some fine gold highlights throughout.
Another Great Post Day!!
Another wonderful day from the postie today. I received my charm from Kim - which is from a swap run by the Surface Designs Group. I love how the edges are done, and can't quite figure out how the fabric is made, but it's gorgeous - all sparkly, and both sides different colours. Thanks Kim!! Also, I received a wonderful green and pink ATC from Doreen. It has beautiful gold embellishments on it, and I really love it!! And how about the equally gorgeous card I received with the ATC!? Thanks Doreen!! Oh, and I didn't receive the "fairy postcard" today, but when I posted about it in a previous post, didn't put up a photo (don't know why - just a forgetful day I suppose) - so here is the beautiful postcard which I received from Anna - which I posted about here.
Tuesday, January 23, 2007
1" Squares Ready to Post
They are all finished now!! (Apart from my own that is). I have made all my squares that need to posted off for our 1" Square Swap. My eyes are now square - I think I'm all squared out at the moment!! Give me some curves please!!!!!!
Monday, January 22, 2007
The Postie Made My Day!!
Look what I received in the post today! My page from SueB (for our Fiber Art Friends page swap) arrived today, and I just LOVE it. The colour of the blue is gorgeous, the design and the fabric embellishment looks fantastic!!! (The photo doesn't do it justice). Thanks so much Sue - it really is beautiful. Sue also sent 2 x charms (for a swap on Surface Designs group), and I've posted a picture of them sitting on some magenta coloured cling wrap which was also included in Sue's post. The charms are fantastic, thankyou! The colour of the cling wrap is "MY" colour - thanks again..... Today was a wonderful post.
Sunday, January 21, 2007
1" Art Squares - Blue
Apart from my red/pink squares - this is the last of the bunch!! This makes 54 so far!! I made the base fabric on the embellisher with a mixture of wool roving and some beautiful yarn I have that is multicoloured. Then there was the fun part - adding the embellishments!! My 13 y/o helped me with these ones - he found everything in my room that was blue and gave it to me, and helped me piece them all on the squares. While he was doing that - the 8 y/o was playing with a bag of dragonfly charms. I didn't know that dragonflies played "army" too....... Oh, what fun we had in my art/craft room!!!????
1" Art Squares - White
Another lot of 1" Art Squares!! Because the monthly technique on Fiber Art Friends is paper, I thought I would make the base using a paper technique. I crumpled up white tissue paper and fused it onto white felt. I then painted it with a metallic white fabric paint, sprinkled silver/white embossing powder over it and zapped it with the heat gun. You can't really see the texture it's made on the photo, but it looks quite nice (if I do say so myself). I zig zagged around the squares, and then added the embellishments. (Not a very good photo)....
Friday, January 19, 2007
ATC Swaps
I am slowly fulfilling my swap obligations! Today I sent off 3 ATC's. 2 went to the U.K. These were made out of my "purple lace" fabric, with the addition of a couple of wrapped tyvek beads. The 3rd one is for ATC-WDU group, an Australian/New Zealand ATC swap group - and the theme this month was New Beginnings. My ATC represents the addition of handstitching in my work, as that is what my aim is. I love the combination of hand and machine stitching. Then I have 2 left over which will be added to some others I will be making for the ATC Challenge which will be on display at the Australian Quilt Convention.
Wednesday, January 17, 2007
Postcard for Anna
Being one of the first four people who said "yes please I'll have one of your lovely fairy cards", I received an absolutely gorgeous fairy tale postcard from Anna. Please visit her site and see her beautiful work!! So, I have made her one in return and I will send it tomorrow. The background is my cling wrap fabric.
Sunday, January 14, 2007
Green/Turqoise 1" Art Squares and Buttonhole Stitch
No. 4 colour finished!! Here are the finished green/turqoise 1" Art Squares. These are also to be included in my TAST challenge for this week, as I've used buttonhole stitch around the edges of them all, and have also included a buttonhole pinwheel.
Saturday, January 13, 2007
To Cheer Myself Up!!
Just wanted to post a picture of one of my very favourite textile pieces. It was a technique from CPS mag, Spring 2005 - written by our very own Dale Rollerson! I loved doing it, and am extremely happy with how it turned out. Don't you love a textile art success story?! In fact, this was my inspiration to head in the direction I'm going now.....
Cling Wrap
Hi all! Just wanted to clarify that I'm not claiming to have invented the method of using cling wrap with fabric - it will have been written up somewhere. In fact, I can remember reading about using cling wrap in one of my many magazines or books quite a while back, and thinking "how cool". As I stated in one of my posts - I saw a box in "Creative Recycling in Embroidery" by Val Holmes, and the blurb stated it was made with cling wrap and fabric - so I thought I'd just experiment.... It's a wonderful method of making a very stitchable type of fabric. I posted how I made it, as I had so many people asking how it was done. I feel better now that I've had my little say - thanks for listening.
Friday, January 12, 2007
Postcard for Francoise
Thursday, January 11, 2007
How I made "my cling wrap" fabric....
1. Lay out your cling (saran) wrap over top of some baking paper to protect the ironing surface. My wrap is red, courtesy of our lovely SueB.
2. Place bits and pieces of fabrics on the top of wrap so the surface is covered, and they overlap each other - doesn't matter if there's gaps here and there - that can be rectified in the next layer. I use mainly synthetic fabrics, but throw in some cotton/silk too. In this sample I have used a lot of netting and organza.
3. Turn your iron on to get hot - I use the hottest setting and my very oldest iron. See where I have taped it back together after I dropped it.....
4. Place another layer of cling wrap over the top, then some baking paper over that - then iron. Just keep an eye on how the layers are adhering - depends on how hot your iron gets. You only want it all to adhere. Doesn't matter if you get holey bits, that can be nice, or can be fixed up in the next layer.
5. Grab some more fabric, or threads or whatever you think might be nice, and start laying on the next layer. I used similar fabric as before, and if any bits needed toning down, added some sheer organza over the top of these. I also added some silk throwsters waste to give it some texture.
6. Place another piece of cling wrap over the top, cover with baking paper and iron again. Just keep ironing until you have it how you like. This is where you decide if you want another layer or not. With this piece I have just left it at 2 layers. I also turned it over and ironed the bottom too - just keep an eye on it when ironing.....
This is my finished piece!!!
2. Place bits and pieces of fabrics on the top of wrap so the surface is covered, and they overlap each other - doesn't matter if there's gaps here and there - that can be rectified in the next layer. I use mainly synthetic fabrics, but throw in some cotton/silk too. In this sample I have used a lot of netting and organza.
3. Turn your iron on to get hot - I use the hottest setting and my very oldest iron. See where I have taped it back together after I dropped it.....
4. Place another layer of cling wrap over the top, then some baking paper over that - then iron. Just keep an eye on how the layers are adhering - depends on how hot your iron gets. You only want it all to adhere. Doesn't matter if you get holey bits, that can be nice, or can be fixed up in the next layer.
5. Grab some more fabric, or threads or whatever you think might be nice, and start laying on the next layer. I used similar fabric as before, and if any bits needed toning down, added some sheer organza over the top of these. I also added some silk throwsters waste to give it some texture.
6. Place another piece of cling wrap over the top, cover with baking paper and iron again. Just keep ironing until you have it how you like. This is where you decide if you want another layer or not. With this piece I have just left it at 2 layers. I also turned it over and ironed the bottom too - just keep an eye on it when ironing.....
This is my finished piece!!!
Wednesday, January 10, 2007
"Cheeky - Come Back!!"
Today we had a bit of a drama. We have a cockatiel named Cheeky, who thinks my youngest son Hamish is his Mum/best friend. Cheeky has the run of the house at times and because it was so hot here today we let him inside to fly around where it's a bit cooler. He's a friendly bird to most, but absolutely dotes on Hamish. Well, as Hamish walked outside the back door today - who do you think followed - Cheeky, and off he flew up onto a very high branch of one of our tall gum trees. Of course we all thought we'd never see him again - Hamish called out to him, Cheeky flew a bit closer - Hamish called again, and Cheeky flew to another branch - Hamish called, Cheeky flew even closer - then would you believe it, he climbed down a tree into Hamish's waiting hands. That's love for you!!! (And guess who was outside with my camera at the exact right time???)
Tuesday, January 9, 2007
White/Beige 1" Art Squares
Monday, January 8, 2007
Herringbone Stitch
I have joined in with SharonB's Take a Stitch Tuesday challenge. The first one being Herringbone Stitch. I found an old piece of fabric which was backed with some thin wadding, and started my herringbone sampler. I practiced doing curves and different sizes - all of these stitches were done with DMC thread. I haven't finished, as I plan on using different types of thread and also sandwiching thread between the stitches - but wanted to post this before the next Tuesday's challenge stitch was announced.
Sunday, January 7, 2007
The Deep Blue Sea
I decided to make the page (in my last post) as Sue's page. Sue posted some coloured cling wrap to me, red and blue, as we only have clear wrap in Australia. The background of the page was made with layers of blue cling wrap and various fabrics and fibres. The seaweed is tyvek and the fish I made separately, as I wanted to add more colour to them. I then did a bit of FME on the background for seaweed and bubbles. It will be on the way to the U.S. to Sue tomorrow.....
Cling Wrap from Sue (Thanks Sue!)
Saturday, January 6, 2007
Look what I got!!
I was the lucky winner of a "scrubbles" from Terri. http://stegart.blogspot.com/
Thanks so much Terri! I won't be able to use it to wash dishes though - it's too pretty. I'm going to put it in a little basket in the bathroom with some pretty soap to keep it company.
Thursday, January 4, 2007
My Little Darling!!
My little darling!!!!
While I was making my page for Sue B's fabric book (we are doing a page swap on Fibre Art Friends Group), my little darling was sticking pins in his hands -in his words "just for something to do". Lucky I caught him - who knows where he would've tried sticking them next!!
Sue B's Page (Back of it!!)
I finished Sue B's page, but not sure if it suits the cover that she made, so I'm only going to show the back of it until I decide whether it's Sue's page or not. It's quite shiny and glitzy - I might make it my January journal quilt...... MMmmmmm - let me think on it.
Tuesday, January 2, 2007
Embellished Bag - No.1 in 2007
My first project and first post for 2007!! Happy New Year to everyone - hope it will be a happy, safe and creative one for all of us!!! Thankyou everyone for visiting and leaving comments on my blog - I really do appreciate it - THANKS!!
I made this bag today completely on the embellisher - no sewing involved! Was a bit of a challenge for me - only broke one needle (@@##$$$&&**^%). Not sure if I like it, but I was on a bit of a mission to start and also finish something - so this is the product of this mission of mine.......
Subscribe to:
Posts (Atom)